

PRIMARY SETUP
Failed Breakdown
Price moves below a key level, with confirmation of acceptance and a reclaim establishing the failed breakdown.
Understand the market behavior behind failed breakdowns, the setups FBD Bot monitors, and how dedicated FBD tools support level selection, execution, and trade management.
Breakdowns below key support levels often trap traders chasing the move lower. When price fails to sustain the breakdown and reclaims the level, those trapped sellers can help fuel a powerful reversal. The Failed Breakdown System focuses on recognizing these traps, identifying confirmation, and trading the reversal rather than chasing the initial move.

Mark a meaningful structural level.
A breakdown attracts sellers but fails to hold.
Evaluate reclaim and confirmation conditions.
A failed breakdown occurs when price moves below a significant support level or structural low, making a downside continuation look possible before reclaiming the level. The failure to remain below that area is what the methodology evaluates.
Instead of chasing the initial breakdown, the approach looks for evidence that sellers failed to maintain control below the level.
Prior lows, session pivots, breakout zones, shelves, or areas that previously attracted meaningful reactions.
The flush attracts sellers and tests whether they can actually hold price beneath support.
The reclaim and acceptance confirmation provide context for the failed breakdown setup.
These simplified diagrams introduce the patterns. Detailed setup examples, recaps, and configuration lessons are available to subscribers in the Hub.
Price moves below a key level, with confirmation of acceptance and a reclaim establishing the failed breakdown.

A level was flushed earlier. Price is below it and the setup forms on a reclaim.

Price breaks out, returns to the breakout zone, and reacts from support on the first clean backtest.
The diagrams show selected examples, not every pattern or variation FBD Bot monitors.
The FBD tools help traders find or provide levels, monitor specific patterns, apply configured entries and risk controls, and review their trading activity.
Use your own levels or use Level Engine to identify structural candidates.
Monitor selected levels for failed breakdowns, level reclaims, and support-buy behavior.
Configure risk, targets, stop behavior, contract allocation, and session settings.
Use performance data, trade recaps, and optimization tools to understand your settings.
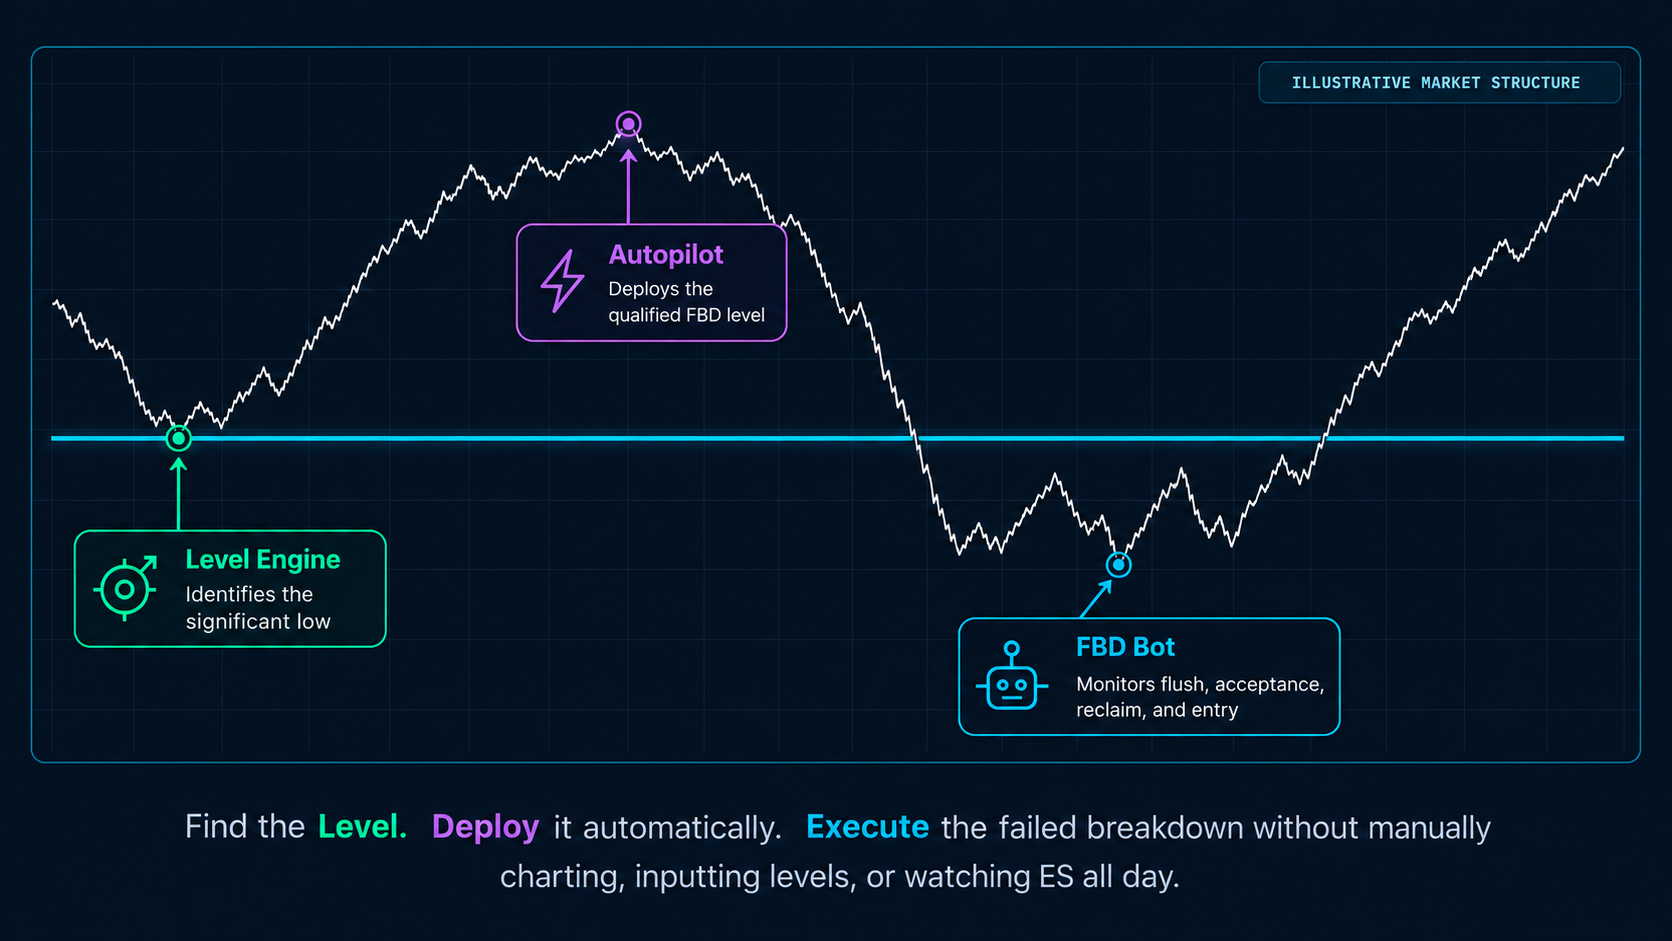
Illustrative product workflow, not an actual trade or live software screenshot. See the actual dashboards
Trader-defined automation. The software responds to configured levels and rules. It is not a promise of profitable trades or a substitute for risk management.
The FBD ecosystem offers separate tools for level discovery, execution, and deployment. The complete product comparison and subscriptions live on the Products page.
Maps FBD, support buy, and reclaim candidates.
Learn More →Executes user-defined levels with saved settings.
Learn More →Level Engine and FBD Bot together.
Learn More →Connects Level Engine directly into FBD Bot.
Learn More →Software can help follow a defined plan, but it does not choose profitable trades for you or eliminate futures risk.